While working on my first product for sale, the StackMag, I bought a lot of neodymium magnets. For the first batch, I ordered 50 magnets from Aliexpress. After gluing them all in place, I noticed that they were significantly weaker than expected. They should have been N35 grade which is basically the lowest you can buy, so I wasn’t expecting them to not even pass that threshold. But they clearly did. So I needed some way to measure and compare the remanent magnetization of the magnets. I came across this paper which described a method that used Helmholtz coils. The magnet was suspended inside the homogeneous magnetic field with a string. It would start to oscillate until it aligns with the magnetic field. Taking the geometry and density of the magnet and the frequency of the oscillation into account the remanent magnetization can be calculated.
Inspired by that article I thought about using the Helmholtz coil in an Anti-Helmholtz configuration which creates a constant magnetic field gradient. This way the magnet would not experience a torque but a force which is easier to measure by just placing the magnet on a weight scale.
Unfortunately, I did not have a Helmholtz coil pair. Yet! Because these are pretty easy to make with a 3D printer. After searching the internet for designs I wasn’t satisfied with what I found. So I decided to make my own. And just for the heck of it, why not make it extra complicated by making a 3D Helmholtz Coil arrangement which is basically three pairs for each the X, Y and Z axis. This way I can control the magnetic field in any direction.
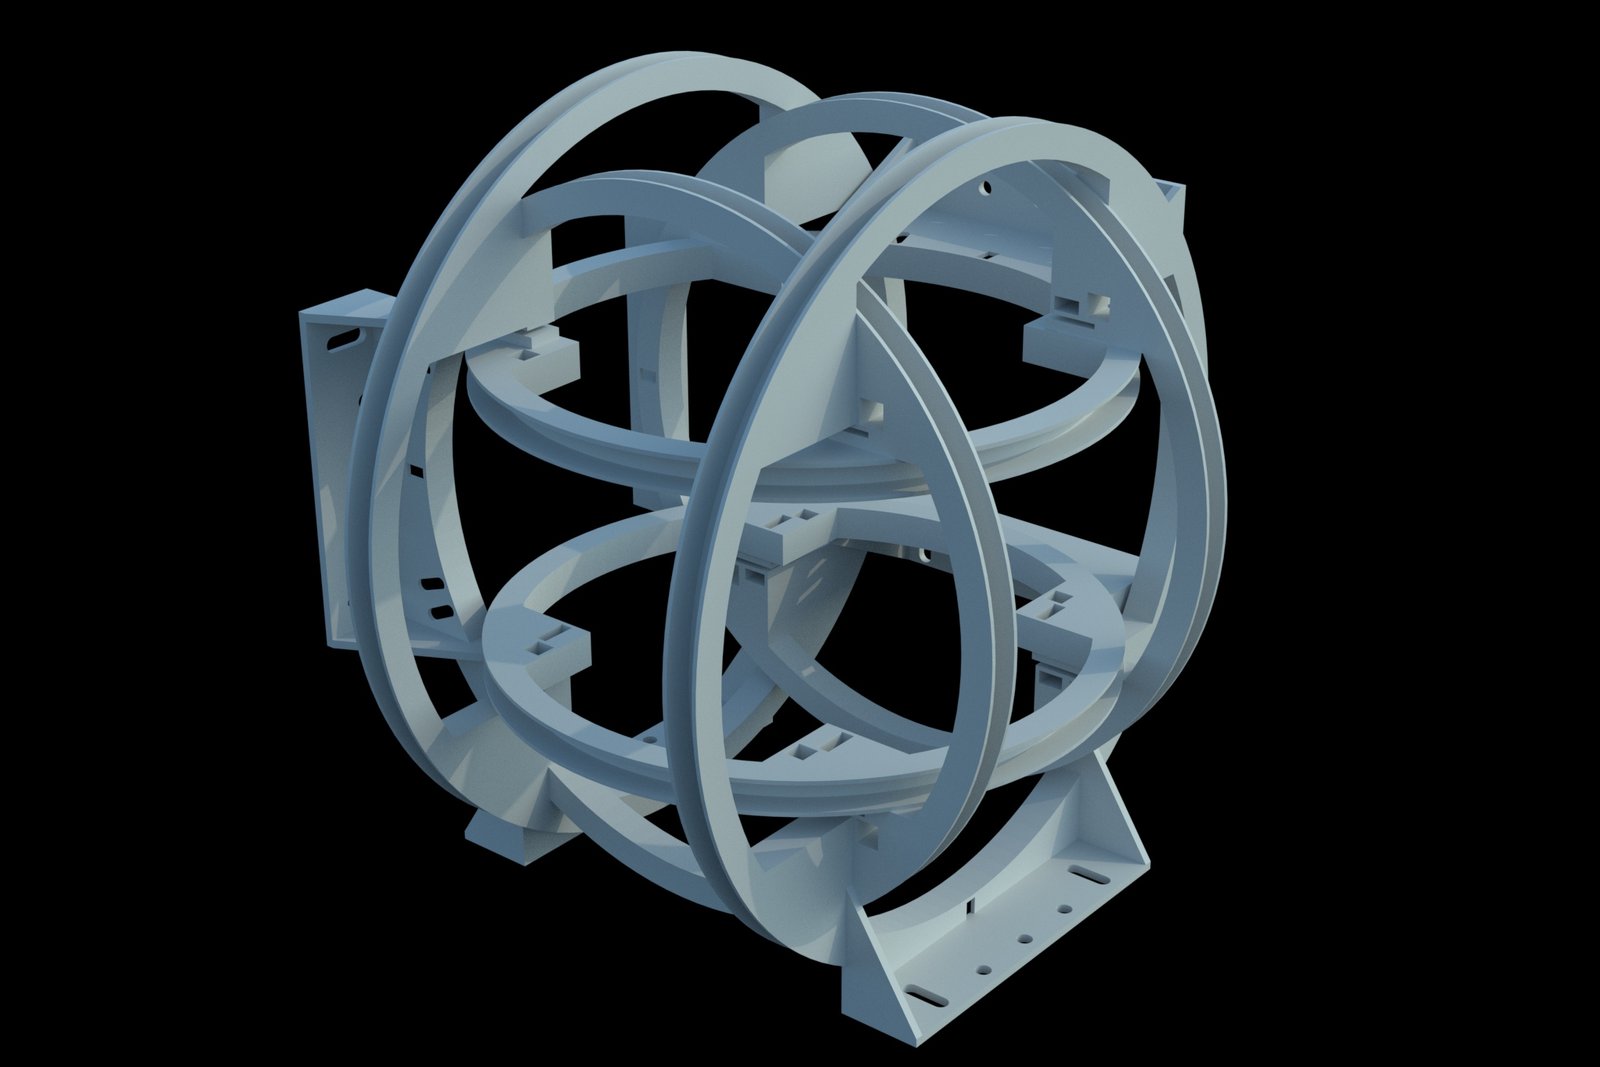
So I made this design. The three pairs should snap into place and all hold each other. The Z coils also have four beams that hold the coils at the right distance. They are not shown in the picture. These beams were also the reason why this design ultimately failed. I did not render them and because of that, I did not realize that I could not assemble that whole damn thing. The beams are in the way of the coil pair that should have been assembled around the Z pair. I could have designed different beams but then the assembly process would have been much more tricky. Anyways, I just continued by only using one pair of coils. At least the rendered picture looks impressive.
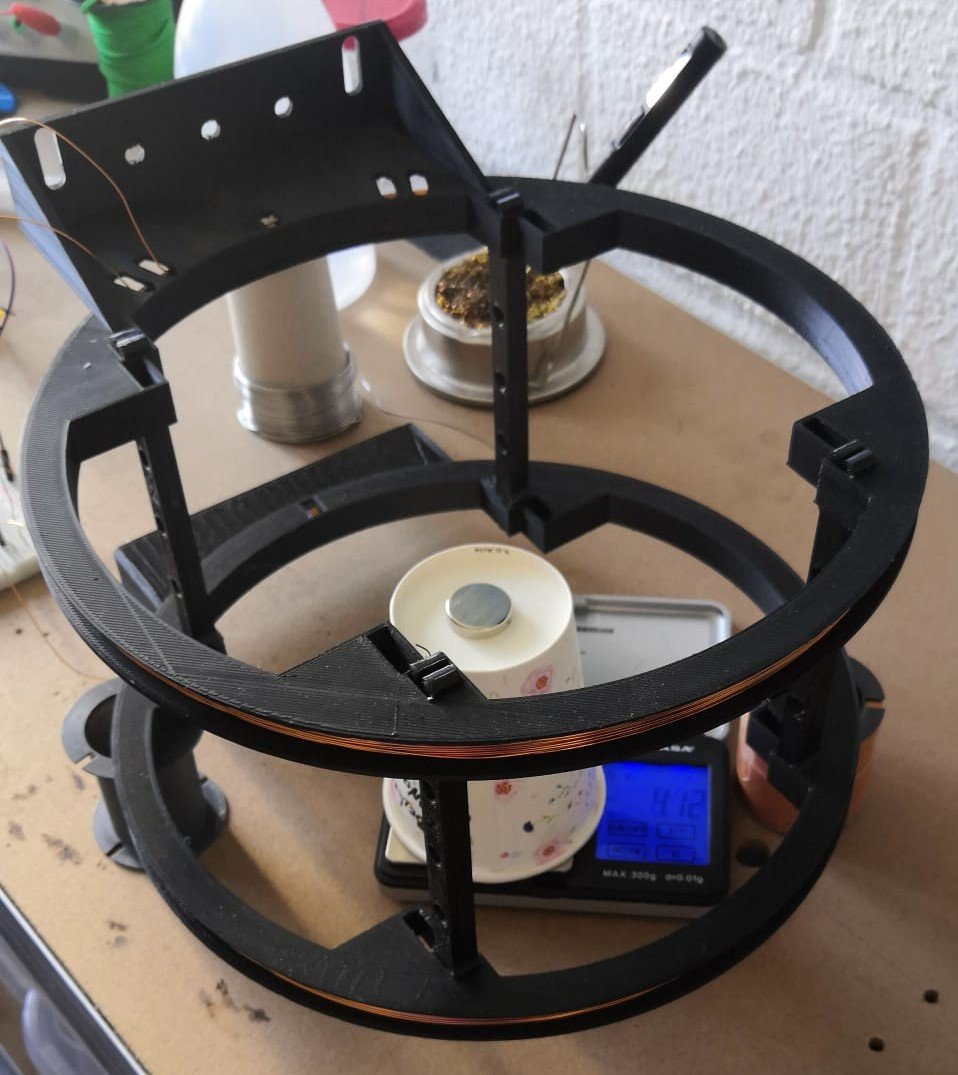
This setup worked pretty well. I was able to prove that the Aliexpress magnets were less than half as strong as advertised!